

Pokepi Game Console

Made by arnov-sharma / 3D Printing / Games & Gaming / Home Automation / Kids & Family / Retro Tech
About the project
Pokémon Themed Game Console powered by the Raspberry Pi Zero W for emulation of old Pokémon games.
Project info
Difficulty: Easy
Platforms: Autodesk, Raspberry Pi, Seeed Studio
Estimated time: 2 hours
License: MIT license (MIT)
Items used in this project

Story
Greetings everyone and welcome back. Here's something fun and engaging.
The PokePi is a Pokémon-themed emulator that will be used to emulate Pokémon games on GBA and GBC consoles.


In this case, we are utilizing a Raspberry Pi Zero W running Retropie, on which we have installed every Pokémon game.
Since the Pi Zero has a USB Micro OTG connector, we created a custom breakout PCB that expands that port to two USB ports, allowing users to connect one or more game controllers. The entire project was 3D printed and constructed entirely from scratch.
Because we are using a Raspberry Pi Zero, which only has 512GB of RAM. Certain games will not be playable, but titles like CONTRA, PAC Man, Legend of ZELDA, and SUPER MAERIO will run well. This project makes use of Retropie OS, which means it can run other games as well, although not many.
This article is about the in-depth build guide for this project, so let's get started with the build.
Materials required
These are the materials used in this project.
- Custom PCB (Provided by Seeed Studio Fusion)
- 3D Printed Parts
- 12V to 5V Buck converter
- USB Micro B Breakout board
- USB Ports
- DC barrel jack
- Raspberry Pi Zero W
- HDMI Adaptor
- Connecting Wires
- JST Wire Harness UC2515
Design Process


The custom USB breakout board and a basic enclosure with a place for the Raspberry Pi Zero are the main components of this project's design. Two USB ports have been added to the front face of the device, which are used to connect game controllers.
We have included an HDMI port opening and a DC barrel Jack for power supply on the back side.
We have added a Pokeball logo to the top side of the model, which will be bonded with glue to the enclosure's lid. To create an accurate-looking pokeball, we additionally modeled the entire thing and printed it in the three shades of PLA RED, WHITE, and BLACK.
Two M2 screws are used to secure the lid with the main body.
Grey PLA was used to print the base body, and transparent PLA, was used to create the top lid. The same settings were used for both: a 0.4 mm nozzle, a 0.2 mm layer height, and 20% infill.
Custom USB breakout Board


We began by creating the schematic for the USB breakout board PCB, which was divided into two sections: the USB breakout part and the power section.
A DC DC converter module, which has connections to CON2 on both its input and output sides, is part of the power section. Here, the setup will be powered by a 12V adapter, and the DC converter will provide a steady 5V/3A supply to the Pi Zero.
The USB D+ and D-ports were connected in parallel before being joined with the CON5 header pin, making up the USB breakout section's two USB ports.
We will be manually connecting the USB OTG of the Pi Zero to the CON5 header pin.
We modeled the PCB and positioned the USB ports correctly using the PCB layout from the design. We then completed the board file.
Raspberry Pi Zero W


We are using the Raspberry Pi Zero W, a small and inexpensive single-board computer that expands the Pi Zero family with wireless LAN and Bluetooth capabilities, for this project.
Its a 1GHz single-core CPU with 512MB of RAM and Mini HDMI and a micro USB OTG port for connecting peripherals, which in our case will be a game controller.
Additionally, to keep the processor cool, we added an aluminum heatsink on top of the processor.
We utilize an outdated USB Micro B breakout board, which has VCC, D-, D+, and GND points on it, to break out the USB OTG connection for an additional gaming controller device. This allows us to attach a USB PCB to the breakout board.
For the HDMI Port, we use a Mini HDMI Adaptor, which has a regular full-size HDMI Port on one side and a micro HDMI Port on the other.
PCB Assembly Process


- Using a solder paste dispensing needle, we first add solder paste to each component pad, one by one.
- Next, we pick and place all the SMD components in their places on the PCB using an ESD tweezer.
- With extreme caution, we lifted the complete circuit board and placed it on the SMT hotplate, which increases the PCB's temperature to the point at which the solder paste melts and all of the components are connected to their pads
- Next, we added the THT components, which included the two USB ports, and soldered their pads using a soldering iron.
Pokémon Logo Assembly


The black pokeball base component is initially assembled, which includes the white center piece, the red bottom area of the pokeball in the lower section, and the white part on the upper section of the pokeball.
Here, we have made the part with very low tolerance, so they fit perfectly in place.
Base-USB Breakout board Assembly1 / 2


We started the base assembly process by placing the USB breakout board inside the main body and securing it in place using two M2 screws.
Raspberry Pi Zero: Base Assembly


Raspberry Pi Zero is added in its place; we use four M2 screws to secure the Pi Zero with four screw bosses modeled on the body.
We see that the HDMI adaptor flexes a little after the Pi Zero is secured; this movement could lead to wear and tear on the PI Zero's micro HDMI port when the HDMI cable is plugged in and out. We use hotglue to secure the adaptor in place in order to fix this.
Wiring Process


- The initial step in the wiring process is to connect the Pi Zero's USB OTG breakout to the CON5 terminal of the USB Board.
- We linked the USB OTG breakout's VCC to the USB Board's VCC, as well as GND to GND, D-to-D-, and D+ to D+.
- Next, we connected the positive and negative terminals of a JST UC2515 wire harness to the USB breakout board's 5V output connector.
- To supply Pi Power, we hook the JST connector onto the GPIO pins 5V and GND of the PI Zero.
DC Jack Assembly


Next, we install the Barrel DC jack on the back side of the main body and then connect its positive and negative terminals with the USB Board's 12V and GND terminals.
We will be using a 12V power adaptor to supply 5V to Pi Zero.
Top Lid Assembly

We apply super glue on back side of the Pokeball Logo and added the Logo on top of the Lid Part.
Final Assembly Process


We slid the lid in place on top of the main body.
Two screw bosses have been added to the main body, and two M2 screws are used to fasten the lid to the main body via these screw bosses.
Result

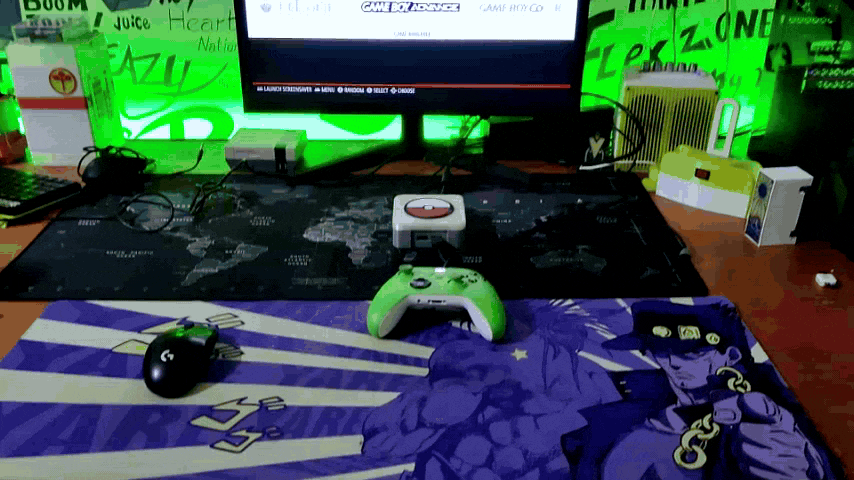
Here is the end result of this little build: a completely functional, portable gaming console with a Pokemon theme. Here, a Pi Zero Snuggly is securely mounted inside the enclosure. On the front side, there are two USB ports where users may connect one or more controllers. On the rear, there is an HDMI connector for connecting an external monitor and a DC barrel jack for supplying 12V power.
RetroPie: Setting Up

Here, we are utilizing RetroPie, a well-known open-source OS that lets you transform a single-board computer, like the Raspberry Pi, into a retro game console. Enjoy old games from systems such as the NES, SNES, Sega Genesis, PlayStation, and many more. It is made to simulate a broad variety of retro gaming devices and platforms.
It's worth noting that while RetroPie itself is legal, the legality of downloading and using ROMs (game files) from copyrighted systems is a gray area and may vary depending on your country's laws. It is essential to ensure you have the right to use the game files before adding them to your RetroPie system.
- We begin by connecting a 64 GB microSD card to a computer using an SD Card Reader.
- Retropie can be manually installed by downloading the ISO file from their website, or it can be installed using Raspberry Pi Imager, which is by far the best method for doing so.
- Here, we download and set up the Raspberry Pi Imager.
- The SD card is then inserted into the microSD card converter, which is then connected to the PC.
- The welcome screen will appear on the first boot, followed by the process of mapping gamepad keys. After mapping the controller, we arrive at Retropie's home screen, where a list of all the consoles is displayed.
For adding games, we first use a blank pendrive, flash drive, or HDD and create a folder named "RetroPie."
- We added the pendrive into the Raspberry Pi USB port, and the pendrive will start to blink, indicating that the computer is creating folders on the drive. After the blinking stops, we can unplug the pendrive.
- We attach the pendrive to the computer once more and access the retropie/roms folder, where we can see all the console's folders. Finally, we paste the rom into the correct console folder.
- As soon as we connect the pendrive to the Raspberry Pi, it begins blinking once more, indicating that the ROMs are being copied into the Pi. Depending on the size of the ROM, this procedure can often take between two minutes and two hours. Once the copying is complete, the pendrive will stop blinking, allowing us to remove it.
- The Pi will be restarted after the ROMs have been copied into it, and the game list will then be updated.
There's a well-documented wiki made by Raspberry Pi about this process and other steps of using Retropie, which you can checkout at the below link.
https://www.raspberrypi.com/tutorials/retropie-raspberry-pi-tutorial/
Pokémon Gold & Pokémon Emerald


First Ran Pokemon Gold on our setup, which was developed by Game Freak and published by Nintendo for the Game Boy Color. Released in Japan in 1999 and internationally in 2000, it is part of the second generation of the Pokémon series, paired with "Pokémon Silver.".
This is stull consider to be the best pokemon game amoug fans me incuded, as this game contains two regions, the Johto Region and the Kanto Region, along with an additional 100 new Pokémon to the existing 151, making the total pokedex number 251, and we really have to catch em all to complete the pokedex.
Pokemon Gold ran pretty smoothu as the game itself is just 12mb in size and is super low requirment game.
Next, we ran the Pokemon Emerald which a later edition pokemon game made for the Game Boy Advance and was first released in Japan in 2004 and internationally in 2005.
In this entry, the players explore the Hoenn region, aiming to become the Pokémon Champion while thwarting the plans of two criminal organizations, Team Aqua and Team Magma.
This also did ran pretty smoothly without any major setback or problem.
Conclusion


All things considered, this little console is really lightweight and easy to carry around, which is helpful because I frequently move states because of work.
With an HDMI port, this can be connected to any TV with ease. It is powered by a 12V barrel DC jack adaptor, which is widely available.
In a future version, I would like to address the problem of the external monitor, add a small display to this setup so that users can play games on it instead of adding an external monitor, and perhaps replace the Pi Zero with a smaller Compute Module 4 so that users can also emulate PS2 games.
All the details regarding this project including files are attached which you can download.
Leave a comment if you need any help regarding this project. This is it for today, folks.
Thanks to Seeed Studio Fusion for supporting this project.
You guys can check them out if you need great PCB and stencil service for less cost and great quality.
And I'll be back with a new project pretty soon!
Leave your feedback...