

Easy Android Ui For Arduino Project

Made by H1Jam / Communication / Home Automation / Robotics / Sensors / IoT
About the project
Create a Android App for your Arduino projects using Bind, a library supporting BLE, Wi-Fi, classic Bluetooth, and USB-OTG.
Project info
Difficulty: Easy
Estimated time: 1 hour
License: GNU General Public License, version 3 or later (GPL3+)
Items used in this project
Hardware components

Story
Developing interactive user interfaces for Arduino-based projects can be challenging, especially when dealing with various communication protocols.
Bind simplifies this process by providing a lightweight, efficient UI framework compatible with multiple connectivity options.
Paired with the BindCanvas Android app, it enables rapid UI prototyping and development without extensive coding or complex setup.
Features:
- Supports BLE, classic Bluetooth, Wi-Fi, serial ports, and external Bluetooth modules (e.g., HC06, HM10). - Easily manage UI elements such as buttons, text labels, sliders, and gauges.
- Instant synchronization between the Arduino and the BindCanvas app. - Cross-Platform Compatibility: Works almost any Arduino board
- Free and Ad-free Forever: Unlike many others, which is nice, isn't it? Maybe some shout-out to the dev with a 5-star review on GooglePlay ? :)
Read more here: https://github.com/H1Jam/Bind

Details
Getting Started (you may want to watch this video first)
Prerequisites
- An Arduino-compatible microcontroller (e.g., ESP32)
- Bind library
- BindCanvas Android app
- Arduino IDE
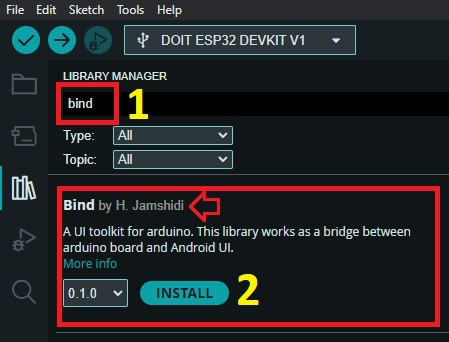
Installation
- Install the library into your Arduino IDE
- Install the BindCanvas app on your Android device from Google Play.

- There are many examples provided with the library but we can also go through one here for an ESP32:
Let say we want to have two buttons on the screen like these controlling the LED:

Here is all the Arduino code you need to generates the above UI elements:
#include "Bind.h"
#include "BindUtil/BindOverBLE.h"
BleStream bleStream;

Bind bind;
BindButton buttonOn, buttonOff;

const int ledPin = LED_BUILTIN;

void buttonOn_pressed() {
  digitalWrite(ledPin, HIGH);
}

void buttonOff_pressed() {
  digitalWrite(ledPin, LOW);
}

// This function adds (or refreshes, if already exist) ButtonOn on the screen.
void addbuttonOn() {
  // Set the Button's position on the screen.
  // Tip: You can use the grid view mode in BindCanvas app to determine the x and y
  // and replace these numbers with the grid values for better positioning.
  buttonOn.x = 30;
  buttonOn.y = 150;
  // Set the Button's text label.
  buttonOn.setlabel("ON");     // button label
  buttonOn.fontSize = 23;      // The Button size is relative to the Font size.
  buttonOn.textColor = BLACK;  // Text color
  buttonOn.backColor = GREEN;  // button color
  // Check this for cmdId: https://h1jam.github.io/Bind/class_bind_button.html
  buttonOn.cmdId = BIND_ADD_OR_REFRESH_CMD;
  // Set the callback function for the Button 1 object.
  buttonOn.setCallback(buttonOn_pressed);
  // Synchronize the buttonOn object with BindCanvas.
  bind.sync(buttonOn);
}

void addbuttonOff() {
  // Syncing Button 2, check addbuttonOn for more information.
  buttonOff.x = 30;
  buttonOff.y = 200;
  buttonOff.setlabel("OFF");
  buttonOff.fontSize = 23;
  buttonOff.textColor = BLACK;   // Text color
  buttonOff.backColor = YELLOW;  // button color
  buttonOff.cmdId = BIND_ADD_OR_REFRESH_CMD;
  buttonOff.setCallback(buttonOff_pressed);
  bind.sync(buttonOff);
}

// This function gets called every you connect.
void onConnection(int16_t w, int16_t h) {
  addbuttonOn();
  addbuttonOff();
}

void setup() {
  pinMode(ledPin, OUTPUT);
  Serial.begin(115200);

  // Initialize the Bind object and specify the communication method
  bleStream.begin("YOUR_DEVICE_NAME", bind);
  bind.init(bleStream, onConnection); // onConnection is the function defined above.
}

void loop() {
  // Nothing is needed here for BIND over BLE and WIFI.
  // For Bind over Serial port or USB-OTG you have to call bind.sync() here.
  delay(1000);
}
Upload the code to your ESP32 boards and then open the BindCanvas App on your Android Device; press the connect button, and then in the connection dialog find you device name (we have chosen "YOUR_DEVICE_NAME" in the "bleStream.begin" function here)

Connect Button

Connection Dialog
And that's it, you will magically see the objects on the screen and can interact with them.
Also if you don't like there positioning, you can move them around using move button and drag them around (you can later change your code to make it permanent)

Move Button
At the end
This was just a scratch on the surface of Bind, there are a lot more you can do with this library and app. For more information you may check these links:
https://github.com/H1Jam/Bind
https://h1jam.github.io/Bind/class_bind.html
- For this example I randomly used an ESP32-C3 but the example should work with any ESP32 boards
- For other Arduino boards or for using WiFi check the example section of the library.

Bind Examples
Code
Credits
Related products


Leave your feedback...